How to Make a Mood Board
We like to start every project, every photo shoot, every creative undertaking, with a clear vision of what it is we’re trying to achieve. And for us - in interiors - that’s not just about what a room or home is going to look like (although that is obviously an enormous part of it), but how it will make you feel when you’re in it - how you connect with and exist within the space and surroundings.
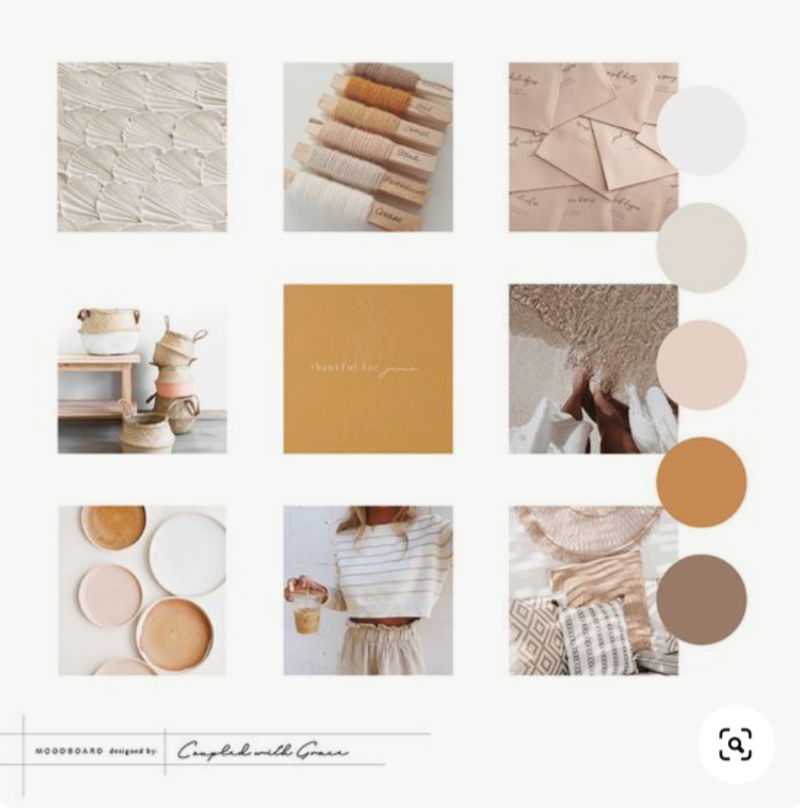
It makes good sense then that the Mood Board has the title that it does - it’s a visual communication piece that provides direction on an aesthetic, and evokes a mood - a feeling, when you look at it. It might conjure up a calming vibe that makes you want to exhale, kick off your shoes, sip the herbal tea, close your eyes. It might be a bright, fresh and airy atmosphere that invigorates you like a G & T when you look at it. Or it might be a sophisticated, organised and elevated aura like the caffeine kick from an almond flat white that’s speaking to you from the images on the board.
A well-crafted Mood Board will help you articulate your vision - taking all those tear sheets, Pinterest pins and saved posts and making sense of them in a way that’s tailored just for you. It will identify what it is that you’re drawn to (the look), and why (the feel). And it will ensure all the decisions you need to make about the project along the way are guided and informed (and therefore, much easier!).
So how do you make one?
The truth is, there are no hard and fast rules about making a Mood Board, but having made many for ourselves and our clients, we have a bit of a formula we follow which can be broken down like this:
1. Be clear on what the Mood Board is for
Is this for a whole house? An exterior or interior or both? A bedroom makeover? Or a dinner party theme? Set the parameters you’re working within so you don’t get lost pinning images to your board that don’t add any value to the task at hand and end up confusing the message.
2. Choose your weapon
There are a plethora of apps, programs and old-fashioned methods that can help you pull a mood board together. From the physical scrap book where tear-sheets are arranged on a page, to Pinterest, where you can create boards and pin relevant digital images to it. We use Canva to create our boards, which allows us to present images, drawings, text and our brand in a beautifully designed template.

3. Begin with a scene
Find a room / house / scene that resonates with your end vision. Perhaps a kitchen image that evokes the lines, softness, colours and general vibe that makes you go “THAT!”. If you’re finding it hard to pick, ask yourself what it is you like about the kitchen images in your shortlist. Is it the dark moody colours? Or is it the soft curves in the custom joinery that have caught your eye? Or is it actually less about the kitchen and more the floor to ceiling windows that bathe the whole room in the image in natural light? Dissect your shortlist of pics and see which one ticks the most boxes for the end goal.
Tip: if you’re creating a Mood Board for a whole house, make sure you have an image of key areas i.e. kitchen, bathroom, living, facade, which will help tell the overall story and flow of the home. (This is more an A3 than A4 situation, by the way.)
4. Add an inspo piece
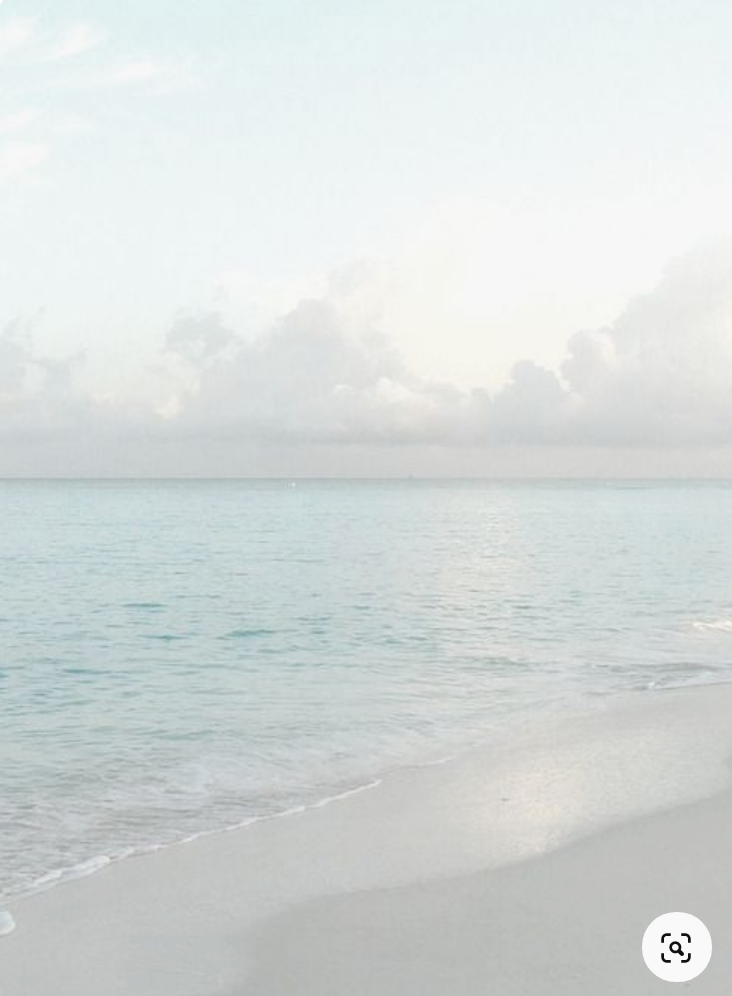
We like to include an image or two that has nothing to do with interiors, but has everything to do with mood and inspiration. Perhaps a soft focus image of white wash skimming the sand at the beach - it’s soothing, refreshing and the colours are calming. Or perhaps an outfit - think about the feeling that an image of a linen maxi dress, sun hat and sandals evokes, compared to a structured skirt, silk shirt and killer heels.
5. Curate a palette of colours and materials
The psychology of colour is a well-researched field, so use a palette of colour swatches on your board to create a mood accordingly. Blue is calming, yellow uplifting, beige warming and so on. Likewise, use swatches of materials to build on the mood - consider the atmosphere that high polished surfaces, marble and metallics create, compared to rugged ceramics, imperfect jutes and chunky wool.
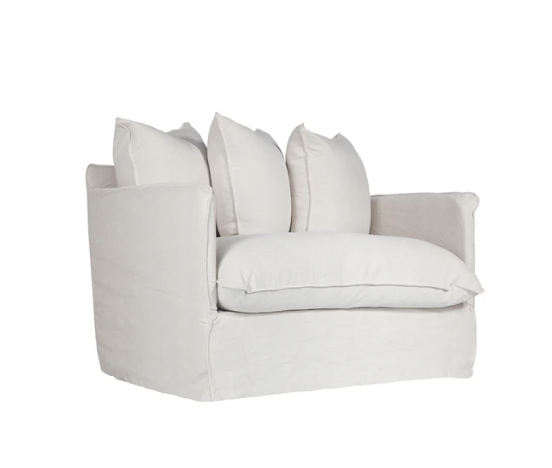
6. Pull in some products
These are the last pieces we insert into a mood board, because we feel it’s important to establish the mood first, and add the detail next. It’s tempting to just create a board with various pieces of furniture that might work in a room, but that’s missing the bigger picture and won’t be as useful in the long run.
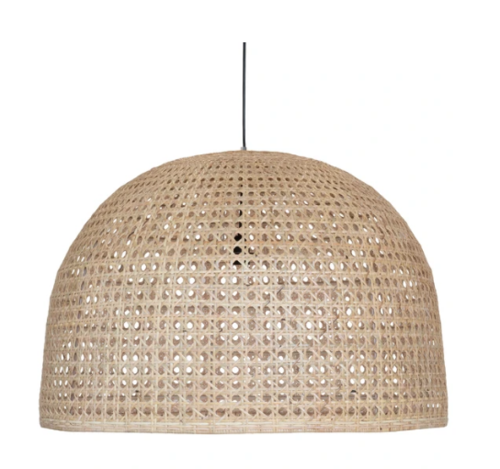
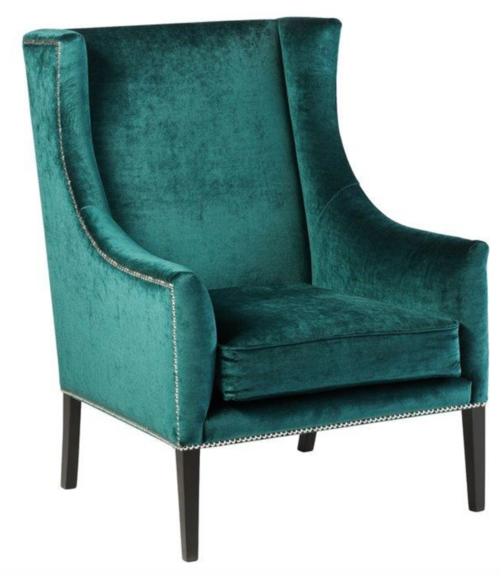
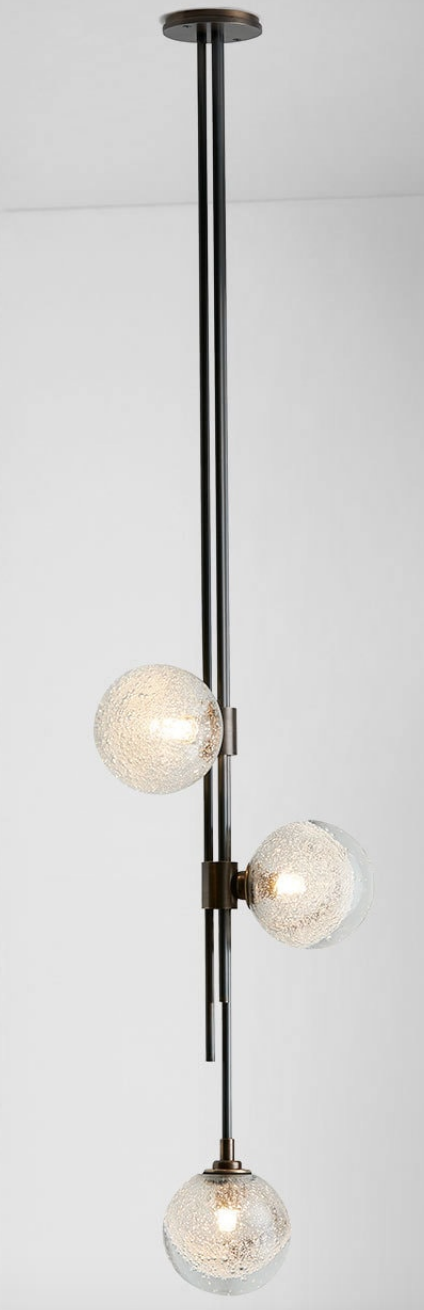
Tip: Occasional chairs and lighting are really useful for articulating a mood and an aesthetic. Consider the difference to the mood between popping an image of a high-back, studded upholstered armchair and an imperfect woven Malawi chair. Or between a glass and nickel chandelier and a hand-made rattan pendant.
7. Edit and adjust.
Stand back and look at what has evolved. Are there too many images, making you feel a bit brain-cluttered and killing the whole zen vibe you were hoping for? Is it too heavy on the pictures of actual rooms - some of which actually conflict with each other? Edit accordingly until you’re really feeling it.
8. Describe what you see and feel
We always finish with a brief synopsis in text of what the Mood Board represents, both in look and in feel. It further cements the decisions that led to the curation of the board and serves as a reminder or prompter six months into the project when other matters are taking up your time and you’ve lost sight of the vision!
Next week on the blog, we’ll share three Mood Boards we’ve created for 2021. In the mean time, start gathering your pics!